

|
INTRODUCTION Anyone who knows me knows that I have always had my enthusiams: my compositions and arrangements, our record company, our publishing company, our Miniature Schnauzers, the Los Angeles Lakers, watching good movies, making recordings, good food, etc. One thing that I've done for enjoyment (not too often - but mostly when needed) was woodworking. In 1984 my friend Mike Englander and I took a Power Tool Safety course in Santa Monica - and I went on to take a Power Tool Woodworking Class. As our class project each of us built a nice table out of red oak. We measured, sawed, planed, laminated, sanded, assembled and finished our projects in about 6 weeks. For over 25 years I used this table for my computers. I still use it to this day.
Over the years I've had many woodworking projects: a door & wall in Chicago, a mixer stand - complete with shelves below and speaker stands (also know as "the ark" - I worked on it for a couple of weeks in the back house and on the day we moved it into the studio it started raining like crazy - there I was with my speaker stands - shepherding them two by two), microphone connection boxes, a king-sized platform bed (for Gustav, one of our dogs, who just had to sleep with us!) and other little gizmos and gadgets.
A few months ago I got it into my head that I needed to have some really good gobos (portable sound altering walls) for my recording projects. They help to isolate sounds when recording more than one person live, they help to eliminate slap and standing waves - and all sorts of other good technical stuff. I did my research online to see who made the best gobos, how much they cost and how they actually worked. Here are links to a few of the sites that I visited:
Once I saw what was available commercially I determined that a) they were all beyond my budget, and b) I could make these things for a fraction of the cost. My second conclusion was true - I was able to make my gobos for well less than half of the commercial models. Determined to have what I wanted I decided that in order to do this right I needed a really good design - and detailed, step-by-step plans. So, I began THE PLAN. THE PLAN I researched how other people designed and built gobos, bass traps, diffusors and many other sound altering devices. Everyone had very different ideas and executions. There were some that were very rough in design and execution and some that were truly works of fine art. I decided that I wanted to go for the fine art category with my gobo design. I wanted not only to control sound reflections (absorption), but also to control standing waves (bass trapping) and scatter parallel waves in different directions (diffusion). I designed a multi-layer gobo that encompassed all of these traits. On the inside (next to the performer) would be a layer of sound absorbing foam (for reflections), then a layer of rigid fiberglass board (for reflections and bass trapping), then a small air chamber, then a sheet of 5/8" particle board (for reflection back into the rigid fiberglass board), then a layer of sound absorbing foam on the other side (for more reflection help). A 1/4" thick plexiglass window would be angled 15 degrees upward to help diffuse sound. There were many examples of this "sandwich" approach in my research - but most had a "live side/dead side" approach, using diffusion and/or reflection on one side and absorption on the other side. I wanted a design that was customized to my recording needs and to address the acoustic problems of my space. The #1 problem I have in my recording space is parallel walls - causing a slap echo and standing waves. I've treated the room on 2 sides with heavy theatrical curtains and it's my hope that this design (combined with the curtains) would solve all my acoustical problems. I spent about 3 weeks delevoping the plan and making detailed drawings and assembly instructions. More on this document later. HERE'S HOW I DID IT I'll take you through the whole process - from conception to design, from shopping to assembly. It's a bit lengthy, but I've included pictures to help ease the boredom. Step 1: Shopping - I called all of the various vendors to make sure what I need was in stock. Sometimes you have to special order things. Sometimes it's just cheaper to buy things over the internet - for example, I bought the sound absorbing foam, spray glue, rigid fiberglass panels and casters over the internet and had them shipped - in most cases free of charge! I then rented a van and took a trip to my local Home Depot to round up all of my hardware, paint and lumber needs. I had a very detailed list (with technical specifications and pricing information) which made dealing with the various vendors much easier. While at the Home Depot I had my sales associate (Jeremy) help me pull the various pieces of hardware and lumber, then Jeremy cut them (included in the cost of the lumber) to length. Here's a few shots of the wood we pulled, Jeremy cutting it and all the wood cut to my initial specs:
Step 2: The inner brace pieces are made for each gobo (remember, I'm making 3 at once) - nailed and glued together and then strengthened by metal corner brackets. 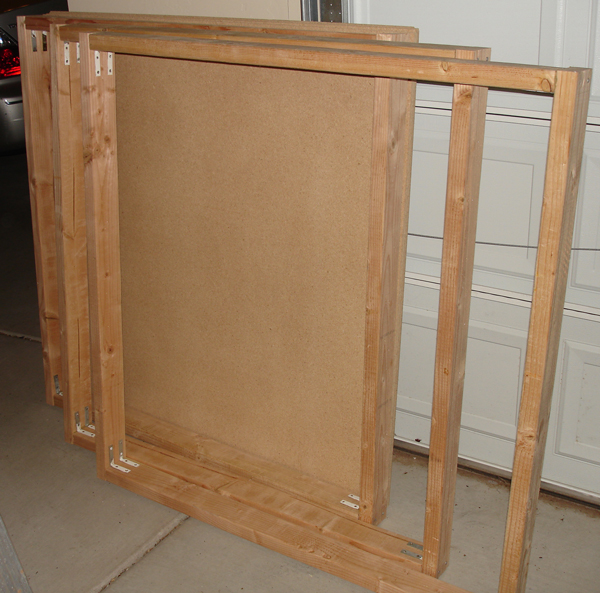
Step 3: The base pieces and caster braces are cut to final dimensions. Caster plates holes are drilled - and casters are attached. 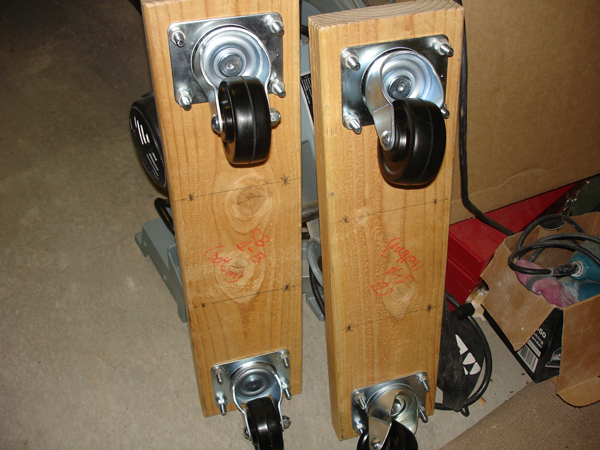 Step 4: Caster braces are attached to the base pieces with glue and 3" lag bolts.
Step 5: Inner brace location is measured exactly on the base pieces and marked.
Step 6: Glue applied to base pieces. 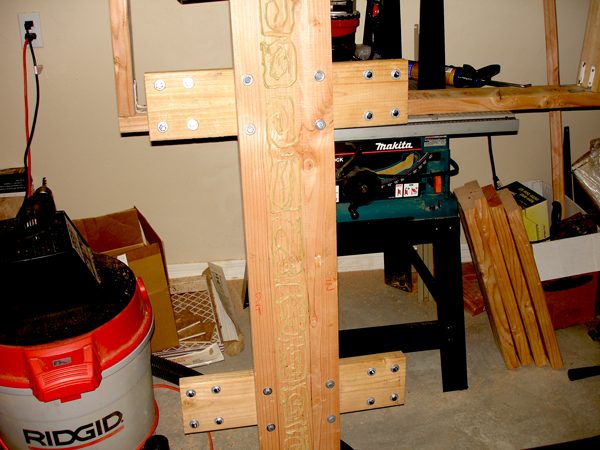 Step 7: Inner braces clamped to base pieces. 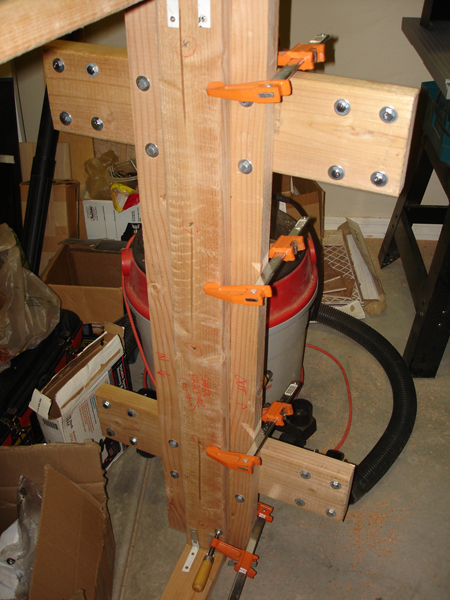 Step 8: Holes drilled and lag bolts inserted through inner braces and base pieces.
The finished "chassis" assemblies almost look like they could be the start of a soap box derby car, no?
Step 9: Inner grid lumber is cut to length and assembled using Mend Plates.
Step 10: Inner grid assembly is inserted inside of chassis. 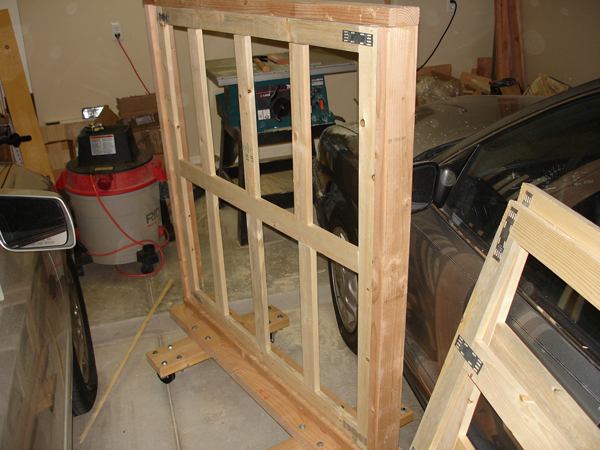
Three gobo skeketons ready for trick-or-treating . . . Boooo!
Step 11: The edge of the inner brace is glued...
and then the 5/8" particle board is attached to the chassis.
Note the airspace cavity between the 5/8" particle board and the inner grid.
Step 12: Rigid fiberglass board edges are measured and cut to accomodate the chassis and inner grid edges.
Edges of the rigid fiberglass board are stripped by 1/2"
Step 13: Glue is applied to the edges of the inner brace and inner grid. 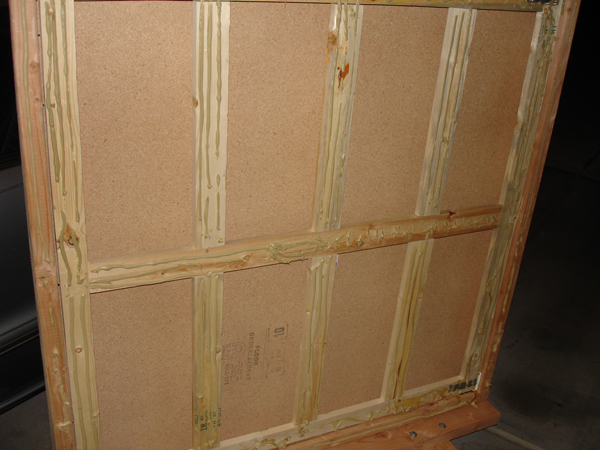 Step 14: The fiberglass boards are attached to the chassis and inner grid using glue and screws (with fender washers).
The gobo "sandwich" starts to take shape: fiberglass board, air cavity (under 2x4), 5/8" particle board.
Step 15: Measure the hardwood trim pieces and mark them - measure twice (thrice?) and cut once!!
Step 16:The table saw is all set up to cut the hardwood trim boards to length. 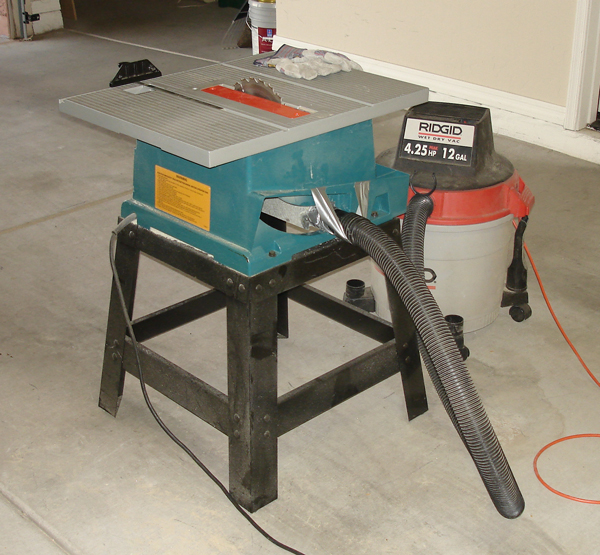 Step 17: The hardwood trim pieces - all cut to length.
Step 18: 15 degree dado cuts made on the hardwood trim boards for the plexiglass.
Step 19: The skirt trim boards are cut out to accomodate the caster braces. 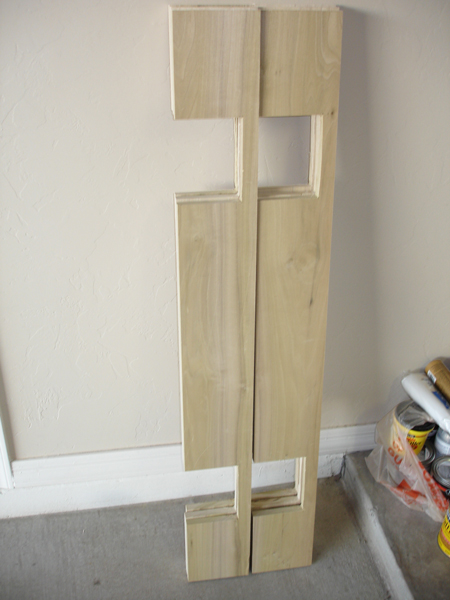 Step 20: All of the screw holes for the hardwood trim boards are measured, drilled & countersunk.
Step 21: Selected hardwood trim board edges are routered with an 1/8" roundover bit.
Step 22: After sanding all trim boards with 60 grit, 100 grit, 150 grit and 220 grit sandpaper the hardwood trim boards are all given a coat of wood treatment so they accept stain evenly. 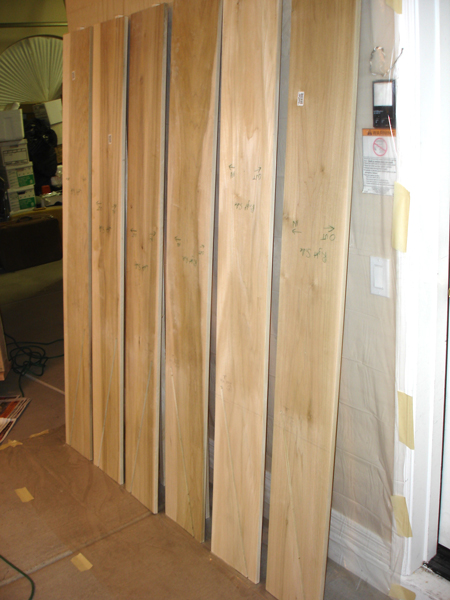 Step 23: All hardwood boards are stained twice (my stain color choice was Golden Pecan).
That second coat of stain really adds more richness to the color (see below).
Step 24: Gobos are assembled without plexiglass and trim board tops. Screw holes filled with wood putty.
Step 25: 2 Coats of clear coat polyethelene are applied for protection. 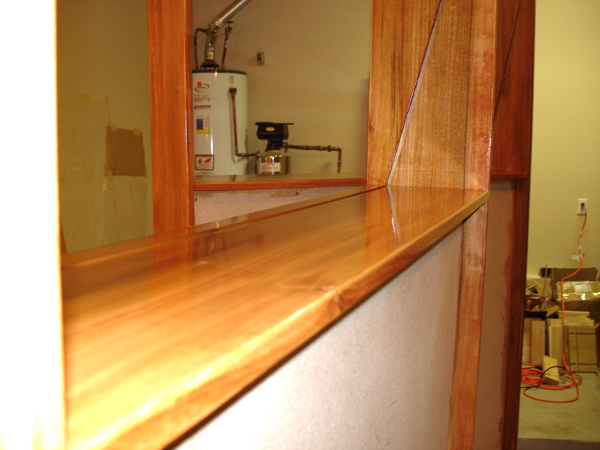
Step 26: The plexiglass sheets are inserted and the top trim boards are attached with screws. (3 views)
Step 27: The skirt trim boards are masked off so that the caster braces and edges of the base pieces can be spray painted black. (2 coats)
Step 28: Absorptive Foam Sound Panels are applied to both sides of the gobos with spray glue and the windows are cleaned, the wood wiped free of excess oils, and - TA DA!!! 3 lovely completed gobos!!
No, I don't plan on going into the gobo-building business. This was a project which I wanted to do (once) - and I'm thrilled with the results! So, while I'm not going to sell gobos I am willing to sell my plan to anyone interested in constructing their own gobos.
Your copy of the Gobos Plan will be shipped via USPS Priority Mail. No international sales, please. Also, there are NO PDF SALES OF THE GOBOS PLAN - only paper copies. I hope you enjoyed my Gobos Project page - thanks for taking a look! To get back to my home page CLICK HERE |